HOW TO OPEN THE METABOX P950HP BACK COVER
August 24, 2019 / by Marco / Categories : Business, Hardware, Technology
I recently needed to install a 960GB SSD Crucial Drive in my Metabox P950HP laptop and had no clue on how to do this. I tried removing all the screws from the back of the Metabox and pried the back cover but it was stuck. I had a hunch there was something more to it but without instructions or videos (couldn’t find any on YouTube) I had no way of moving forward. I checked the Metabox website and there were no manuals. I contacted the Metabox supplier and in their email, they advised there were two options that they were aware of and they will try to confirm this with the manufacturer to which one was correct:
Option 1 – remove the screws and then slide the baseplate down
Option 2 – take the keyboard screw out first and then that will allow the baseplate to come off
I tried option 1 and there was no way the back cover (they called it the baseplate) moved down. It didn’t budge at all. Option 2 was quite interesting but I had no idea on how to remove the keyboard. There were no screws around or on the keyboard to remove. I was totally puzzled by this statement but I persevered and found a way to do it after watching a video of someone removing their keyboard on a different laptop model and brand.
I decided to write some of these steps here in case someone else is looking for some help. Here’s a quick video:
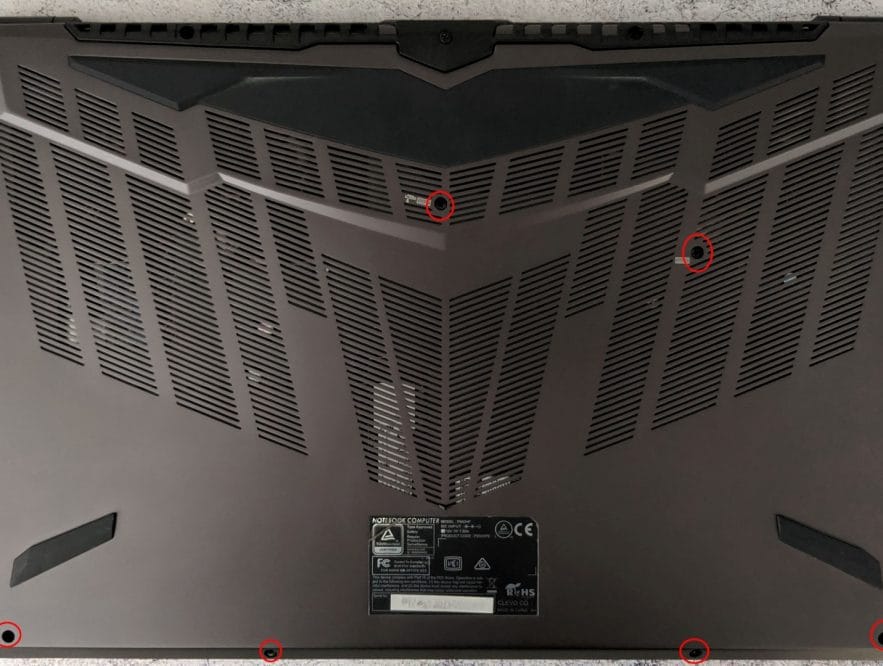
- Remove all the screws on the back cover – there are 8 screws

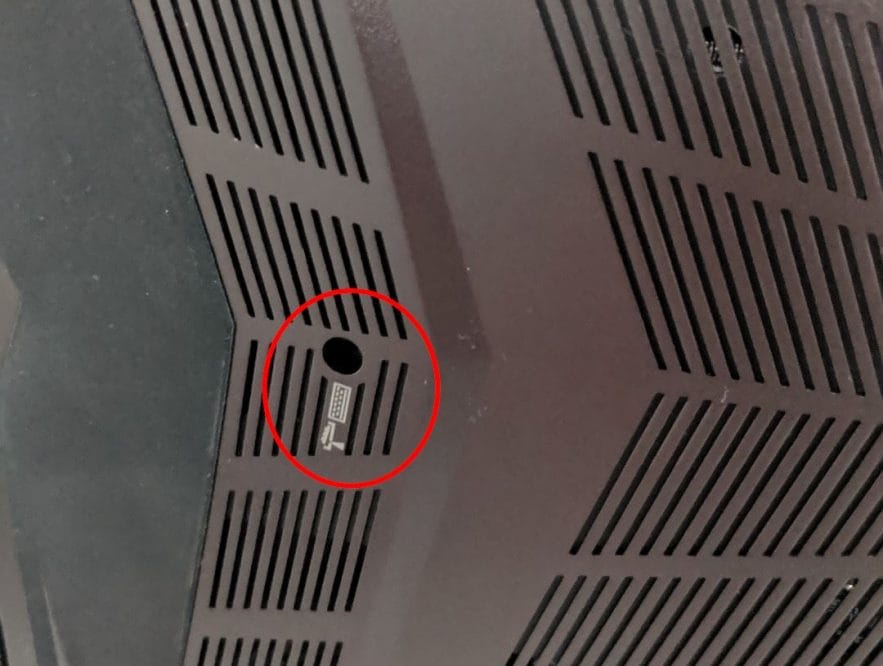
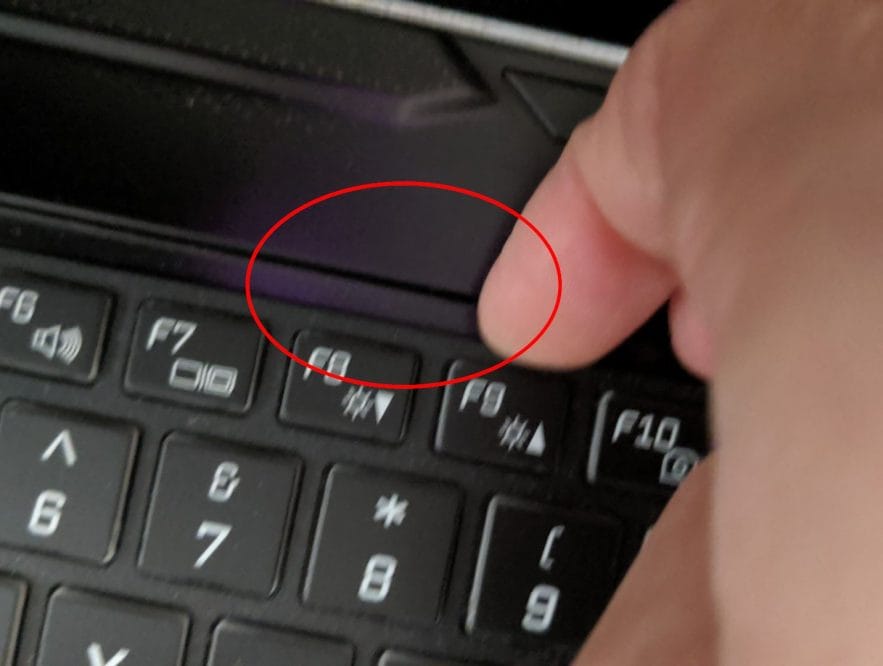
- Use a small screwdriver and insert it in the hole that is in the middle of the back cover. It should have an icon of a keyboard.
-
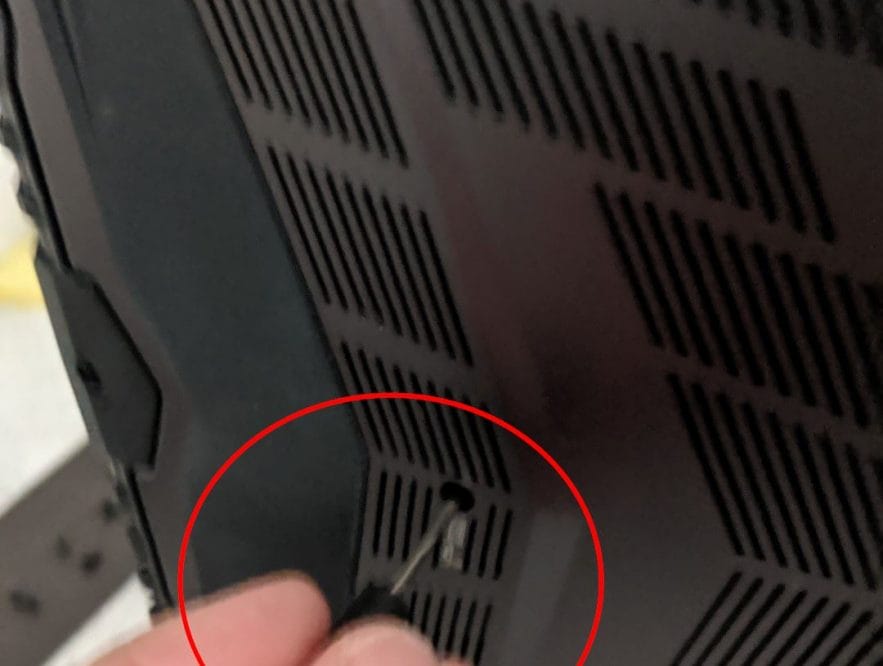
- Push the screwdriver until you hear a clicking sound. This basically pushes the keyboard out near the top (F8 button) so there is a gap to pry it open.
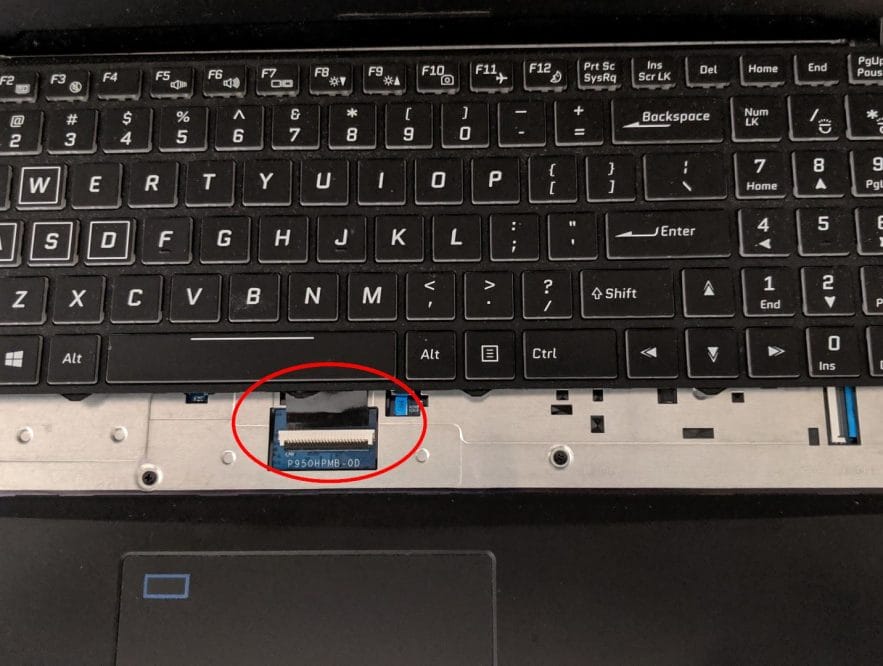
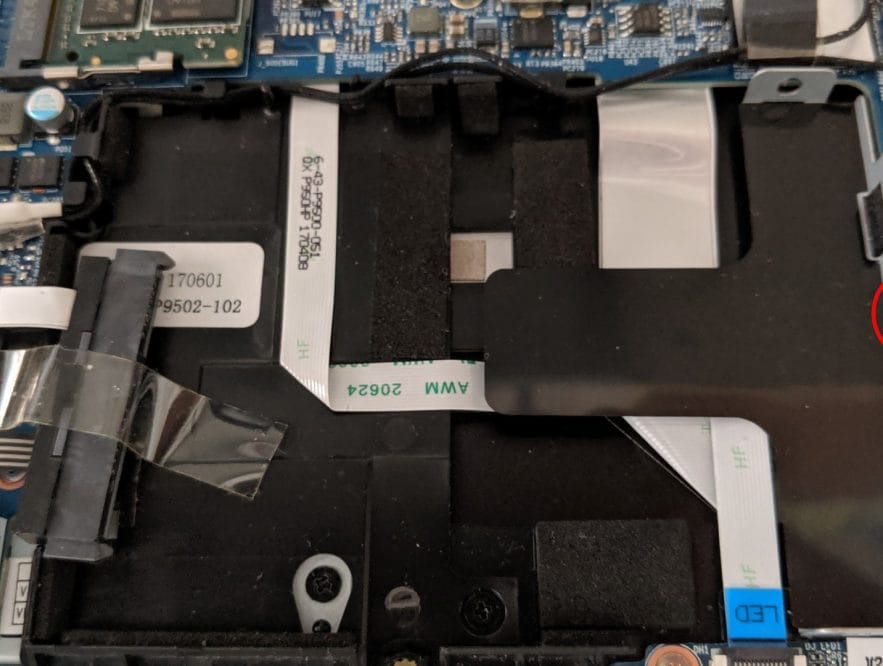
- Gently pull the keyboard out but make sure you don’t completely pull it out because there are cables connected.
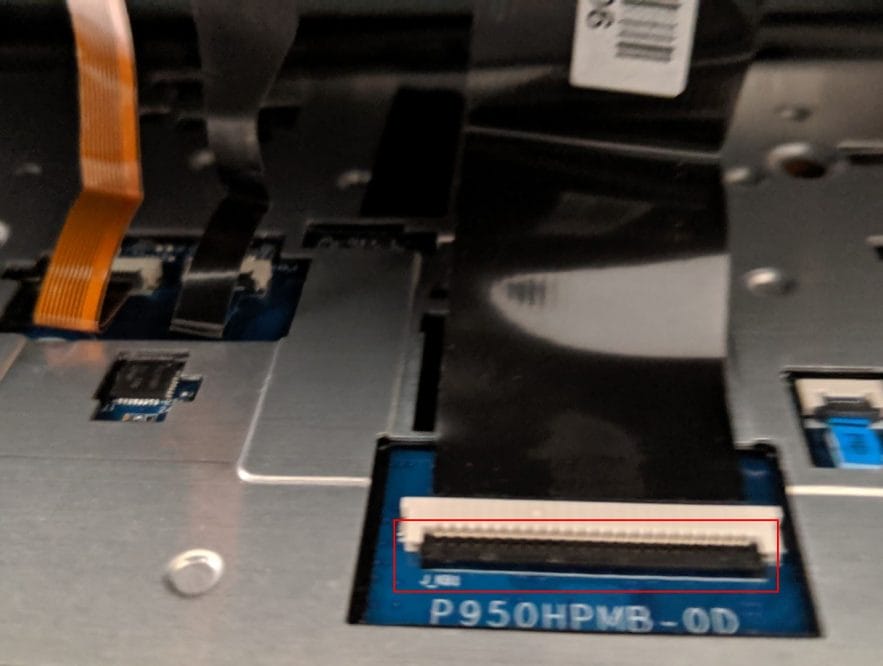
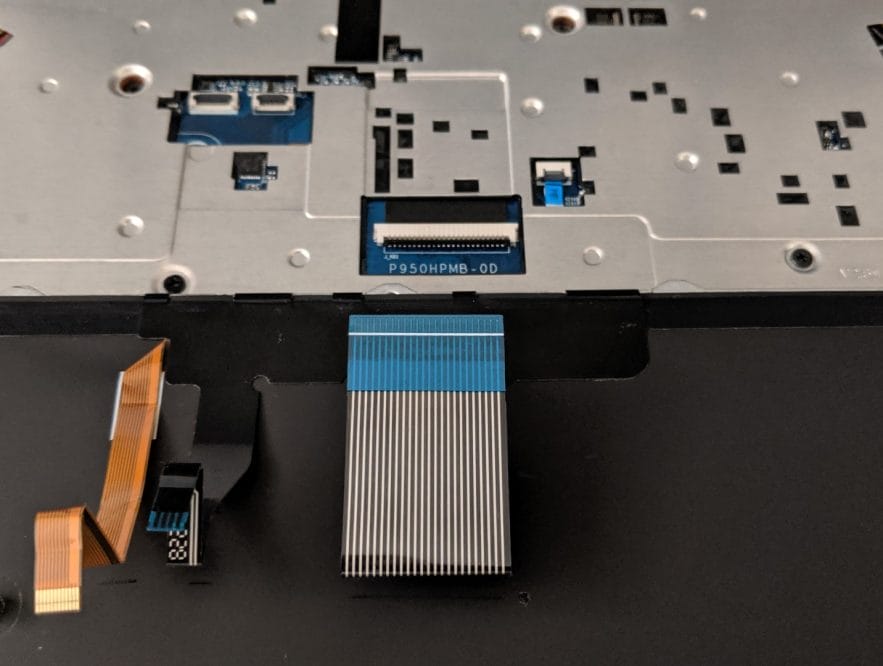
- To remove these cables (3 in total), you need to lift these black levers.
- Remove all 3 cables and the keyboard.
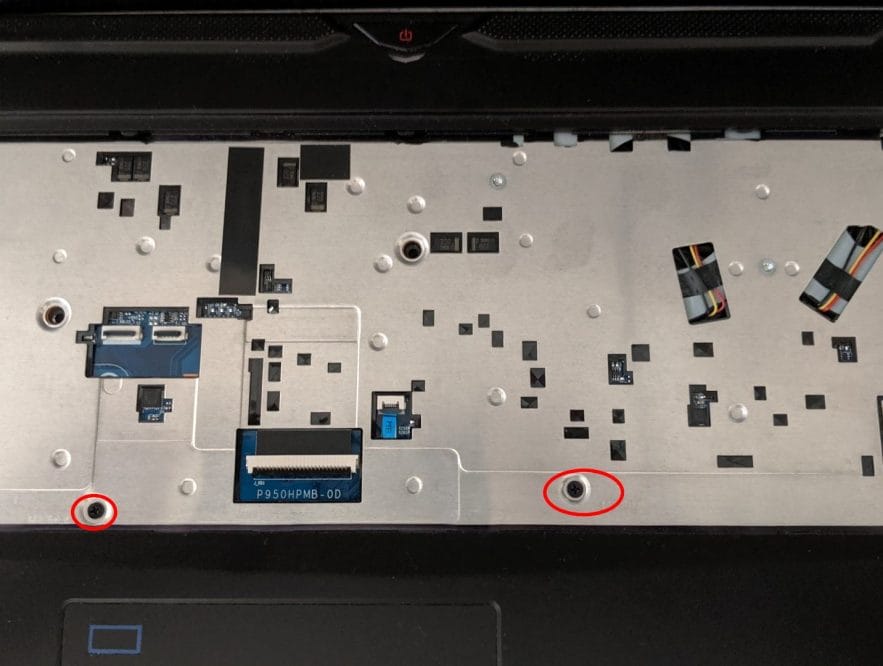
- Remove all the screws that were located under the keyboard.
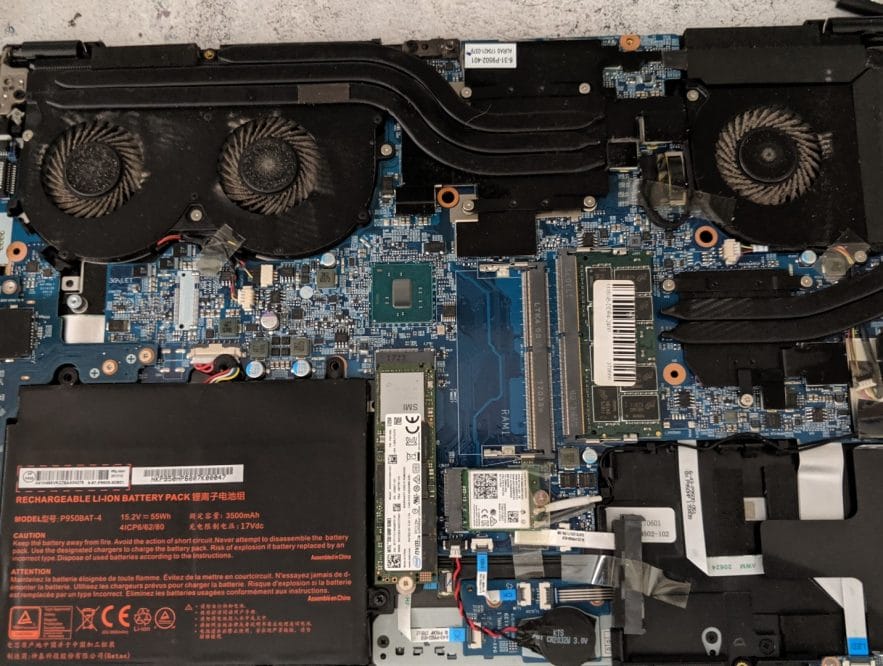
- Once these screws are removed, you will be able to take out the back panel and have access to all the components.
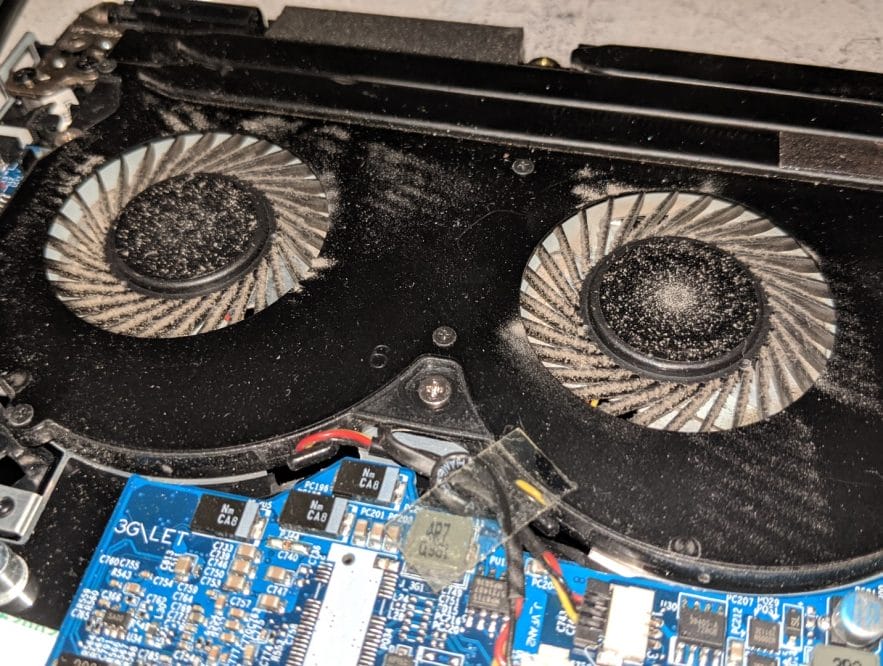
- Yes, the fans are filthy so I needed to clean these up.
- NOTE: If you need to replace the fans because of loud noises then this is the replacement unit: Apower BS50005HS-U3D
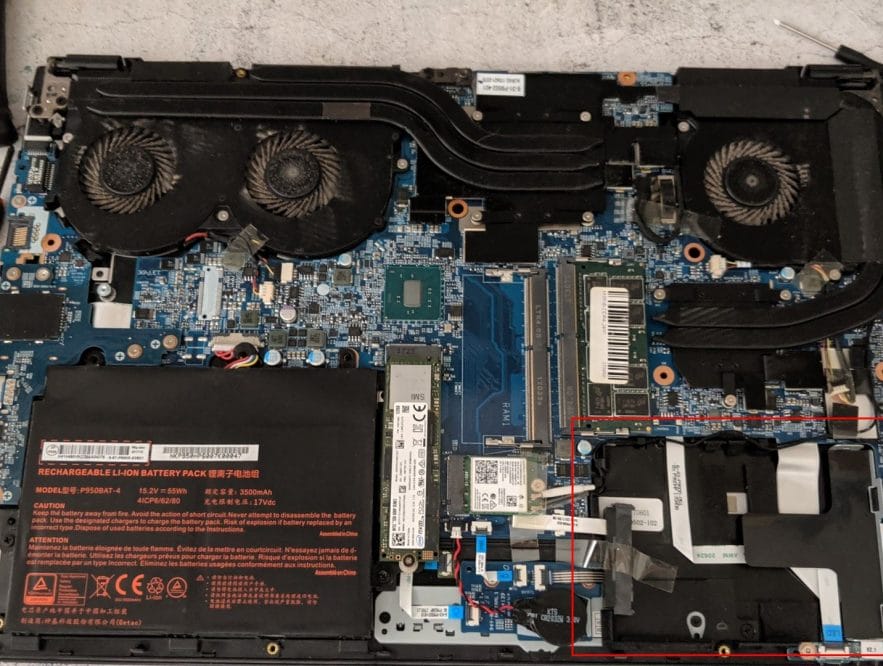
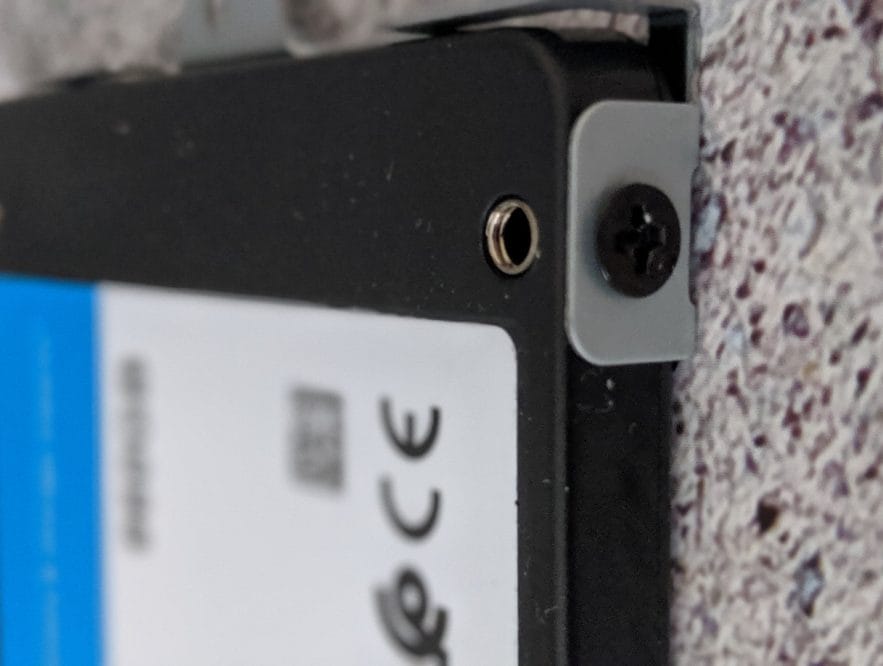
- The SSD bay was located at the bottom right-hand corner of the laptop.
- Remove the single screw to remove the bay.
- Attached the SSD drive to the bay. You will need 2 small screws and I had some spare from my NAS drive bays.
- Reinstall the SSD and bay. Test the SSD before installing the back cover and keyboard.
If you’re looking at installing the memory then this video will guide you through the process:
Hope these instructions helped! Share and subscribe to our newsletter for deals and our latest news.

Marco / admin / 30 Nov
Writing day to day ramblings about making money, business, technology, sharing awesome deals and everything else that I know I'll forget. Follow my personal blog https://marcotran.com.au
I've recently also turned Vegan and started this website Veggie Meals - check it out
"When technology speaks for itself, that is art" - MT
Affiliate Compensated: there are some articles with links to products or services that I may receive a commission.
OTHER ARTICLES YOU MAY LIKE

USING THE LATEST CLAUDE MODEL TO BUILD GREAT TOOLS
If you have ever had an idea for a small tool but stopped because coding felt too hard, the latest Claude model makes that gap much smaller. You can now describe what you want in plain English, ask Claude to plan it, build the first version, improve the design, write the logic, test the workflow, […]
read more
REVIEWING AND UNBOXING THE TOOCKI USB-C RIGHT ANGLE 1.2M CABLE
USB C cables are among the most ordinary accessories we own, yet they can make a surprisingly noticeable difference to how comfortable our devices are to use while charging. The Toocki USB C right angle cable is a good example of a simple accessory that tries to solve a very common irritation, because instead of […]
read more